


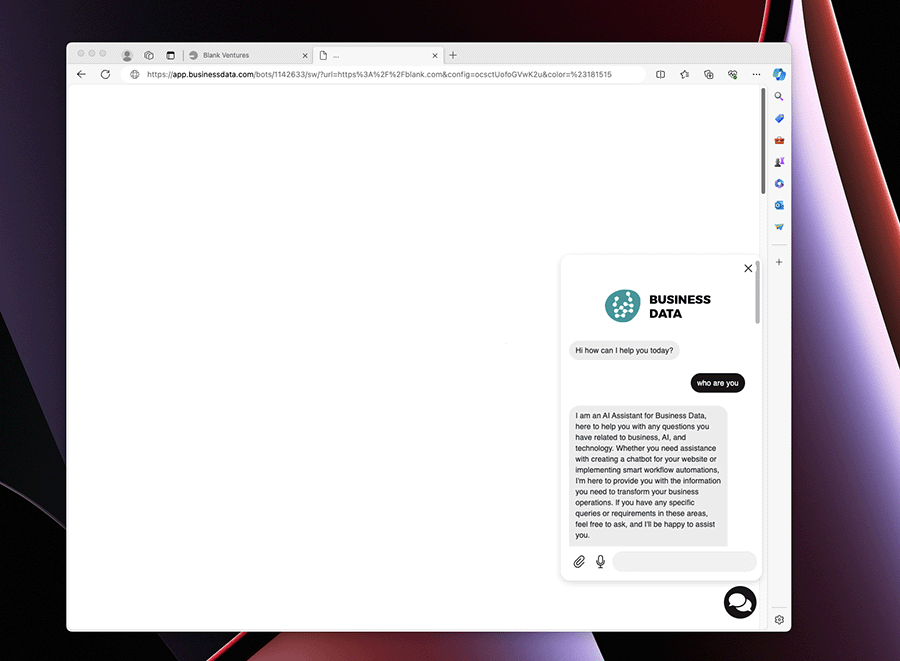
Busines Data’s Webchat enables you to incorporate a chatbot on your website.
This standalone feature doesn’t require linkage to any third-party platforms such as Facebook, Telegram, WhatsApp, or Google. This eliminates the need for your customers to create new accounts and facilitates more effortless interactions.
Additionally, if you gather customer emails or phone numbers via the webchat, your business can easily communicate with them through an SMS or email whenever needed.
Embedding the Webchat code into your website
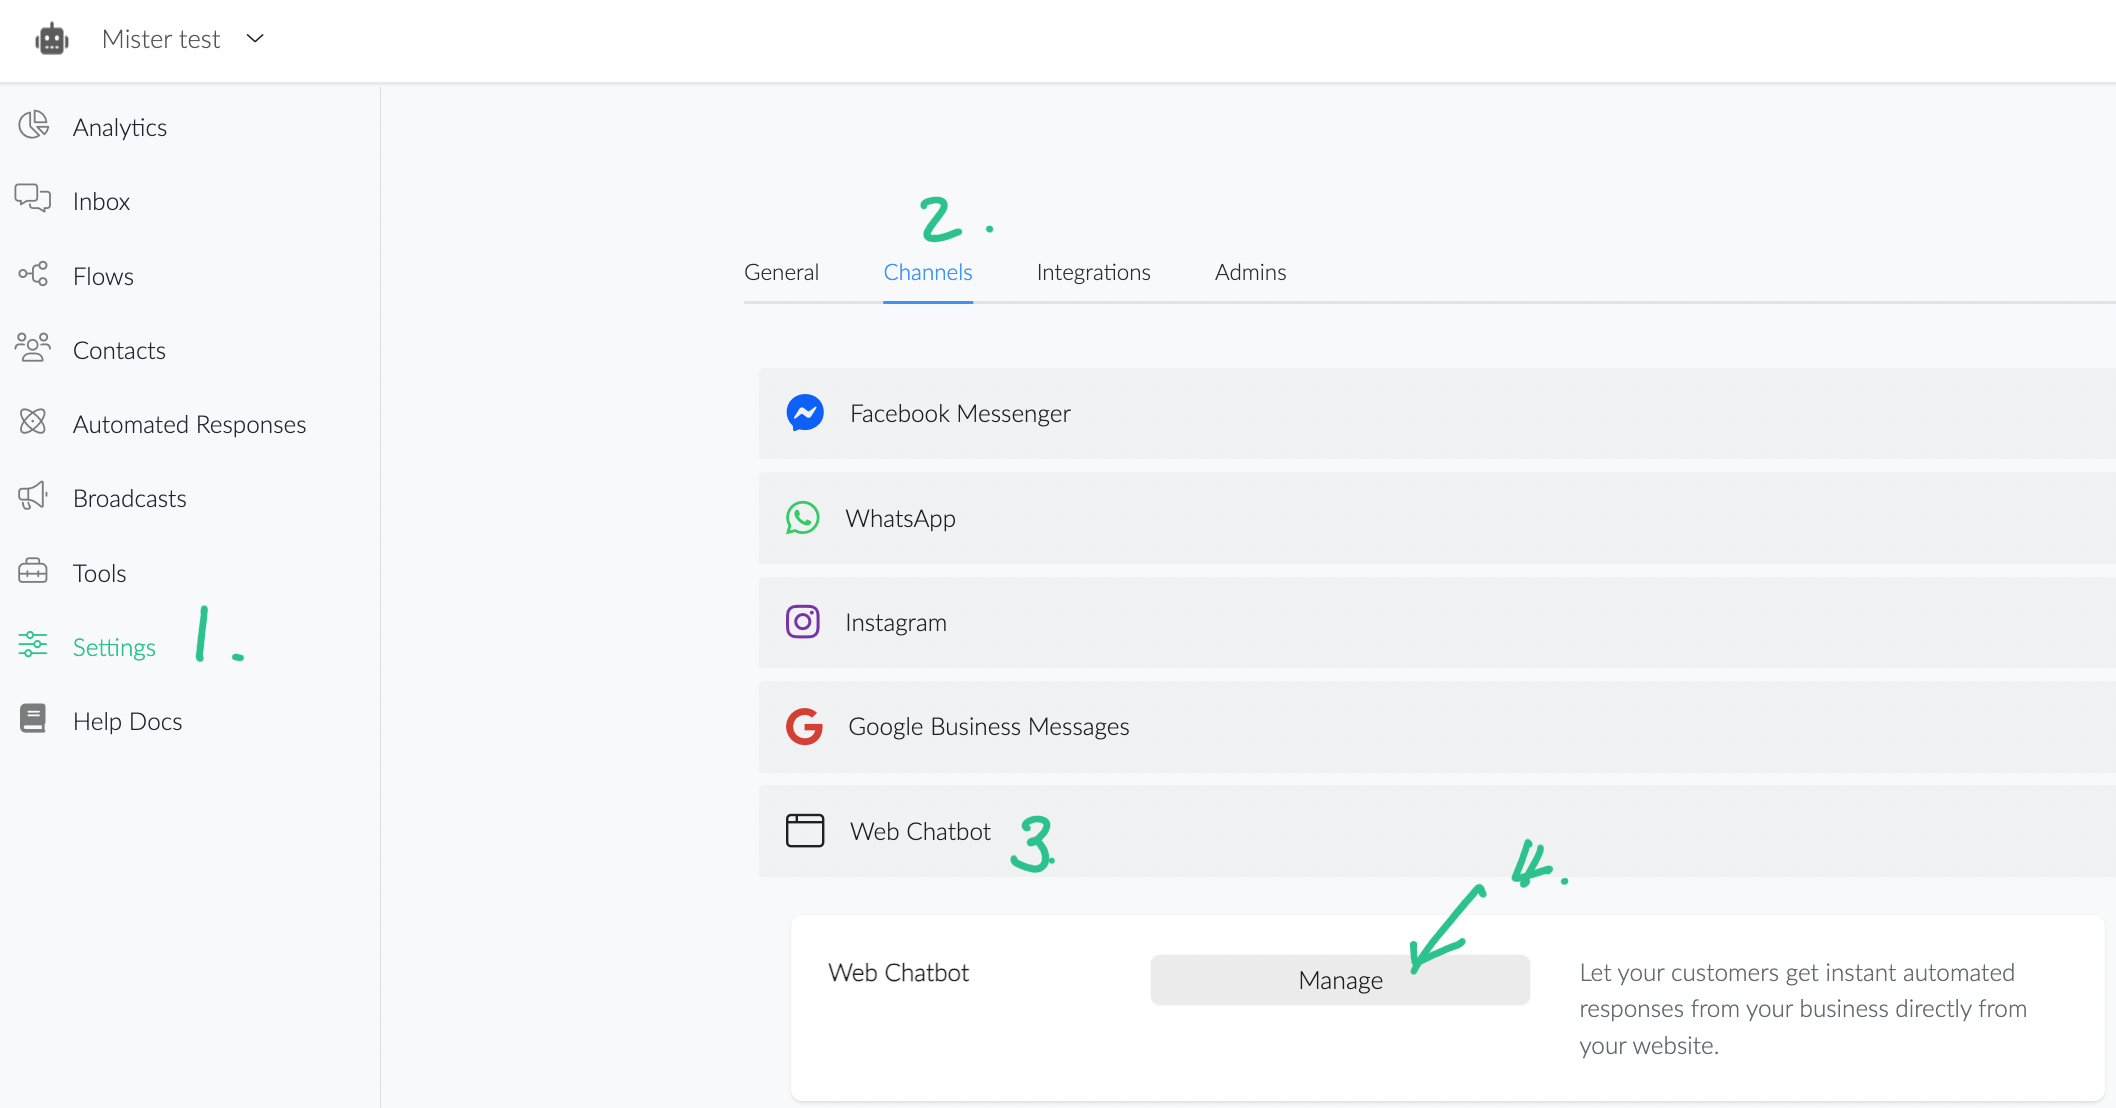
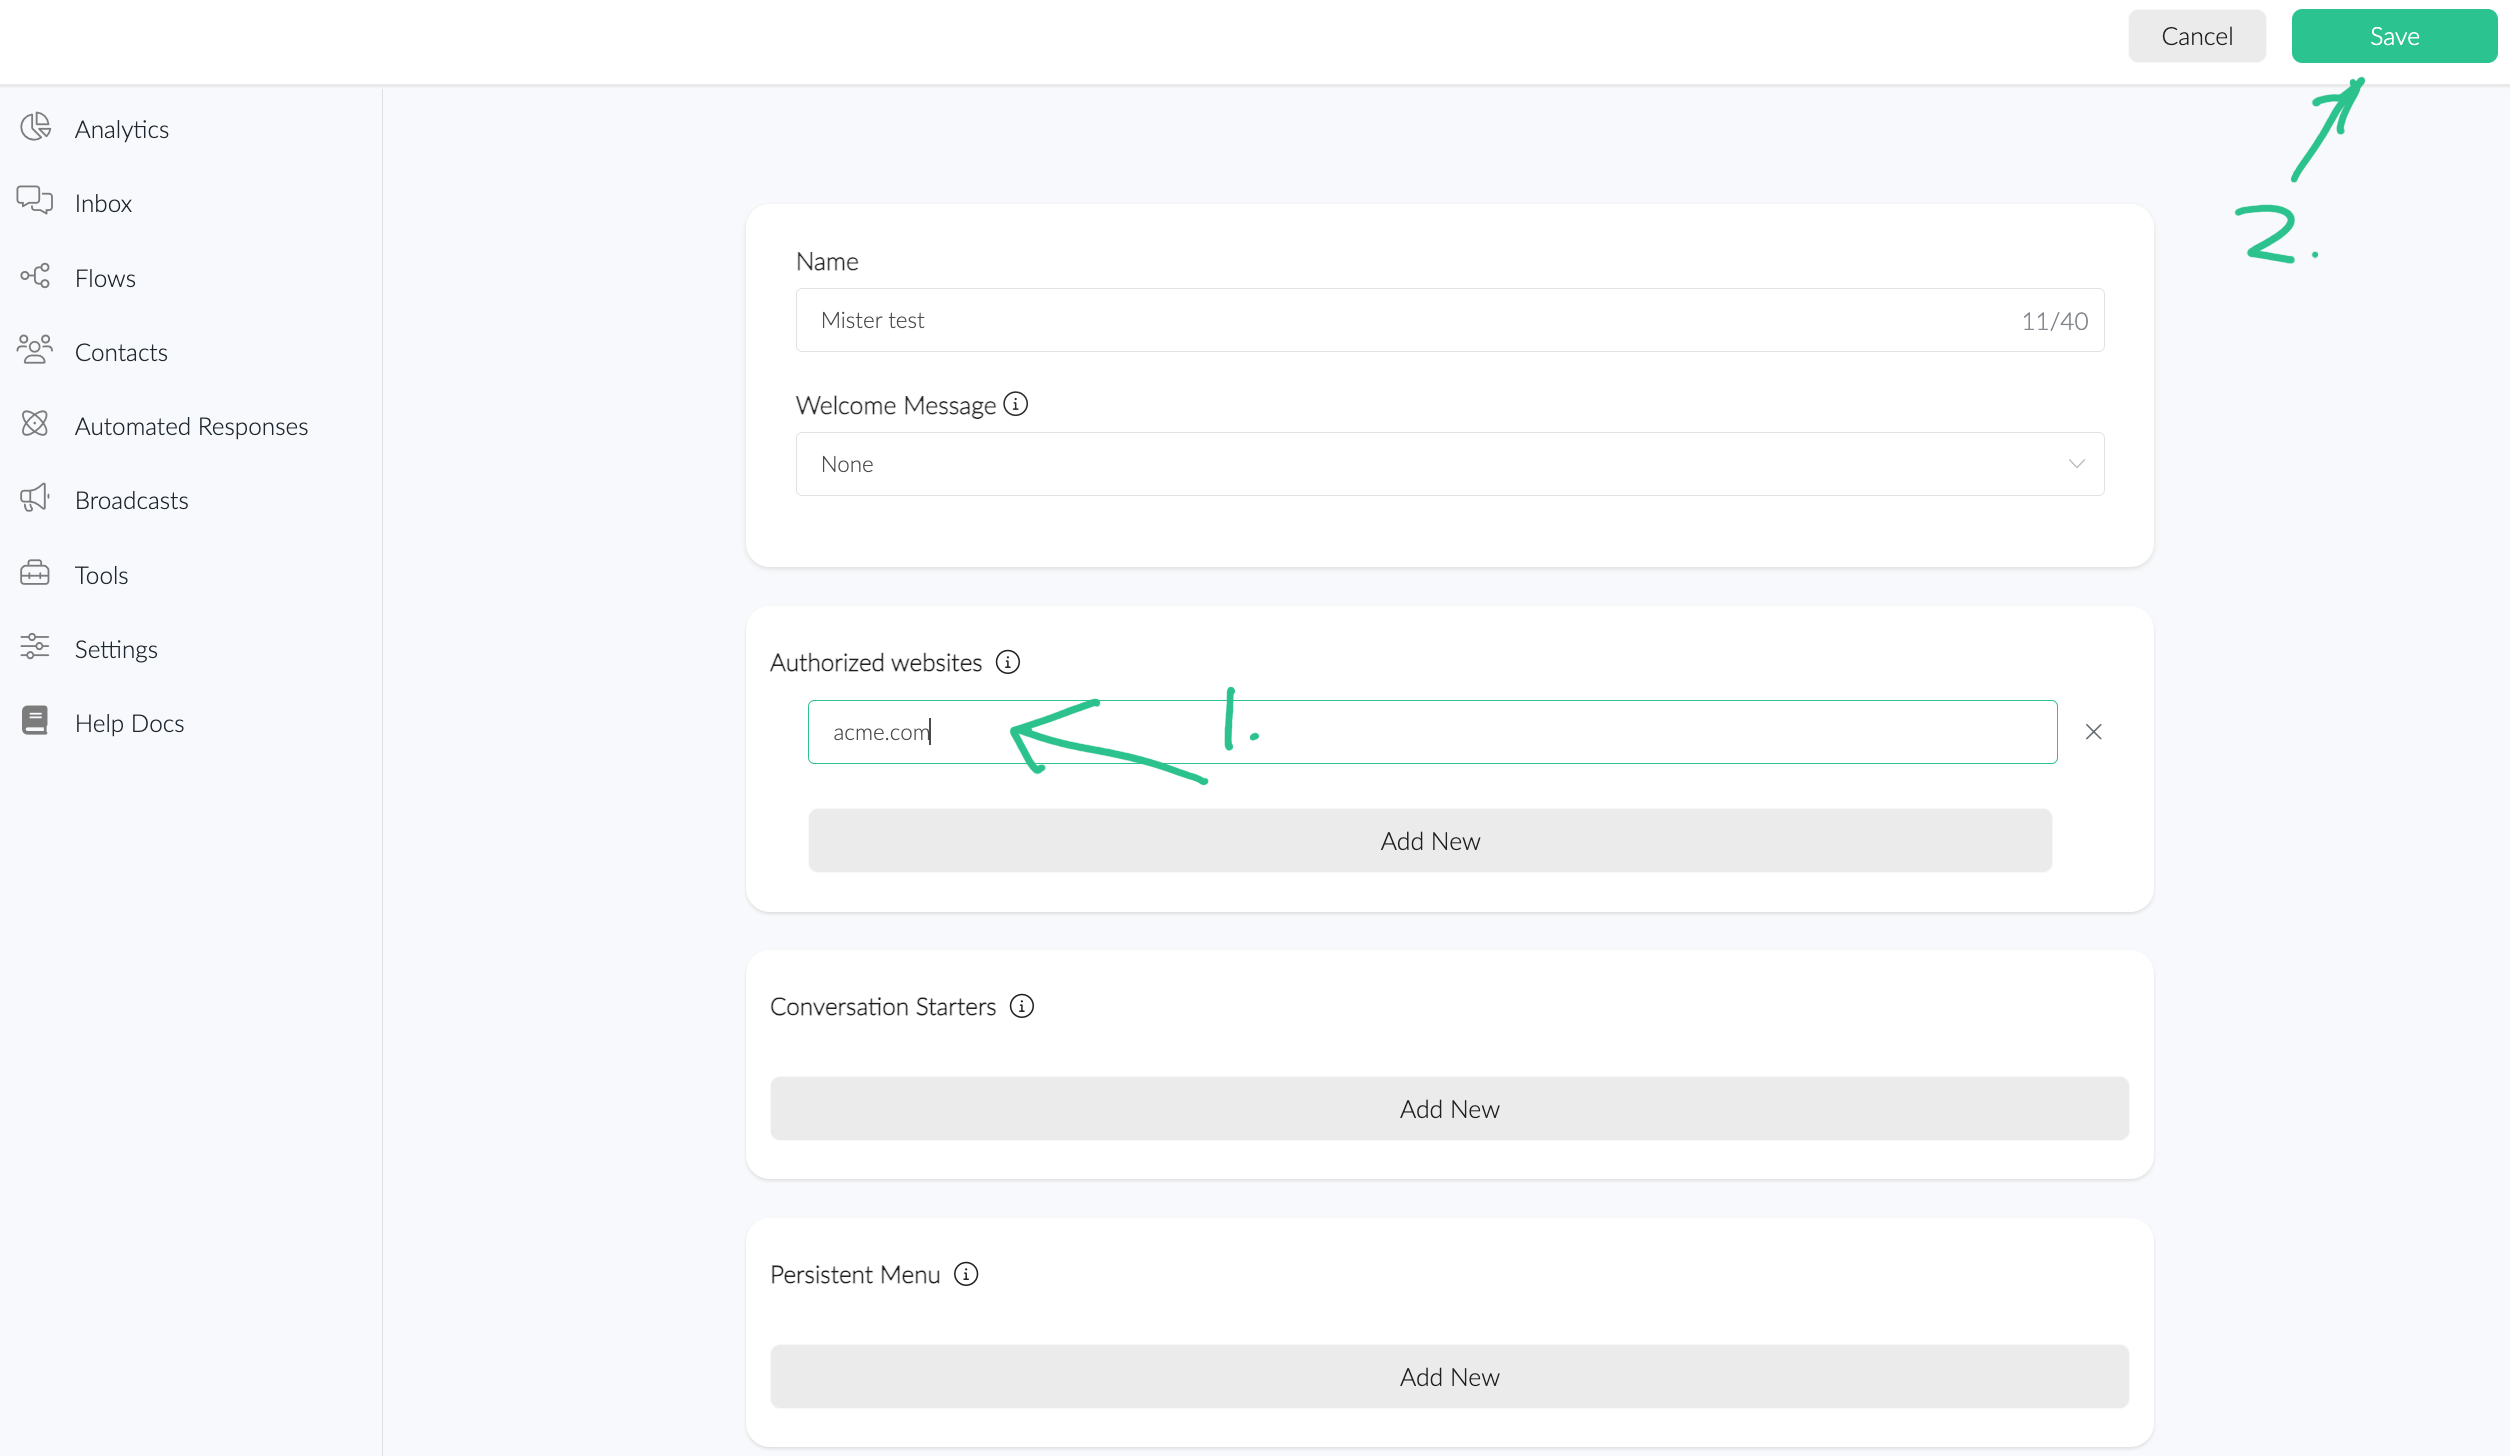
1 – Navigate to Settings > Channels > Web Chatbot > Manage
Add you website domain or subdomain to the Authorized websites.The chatbot will only load on authorized websites.
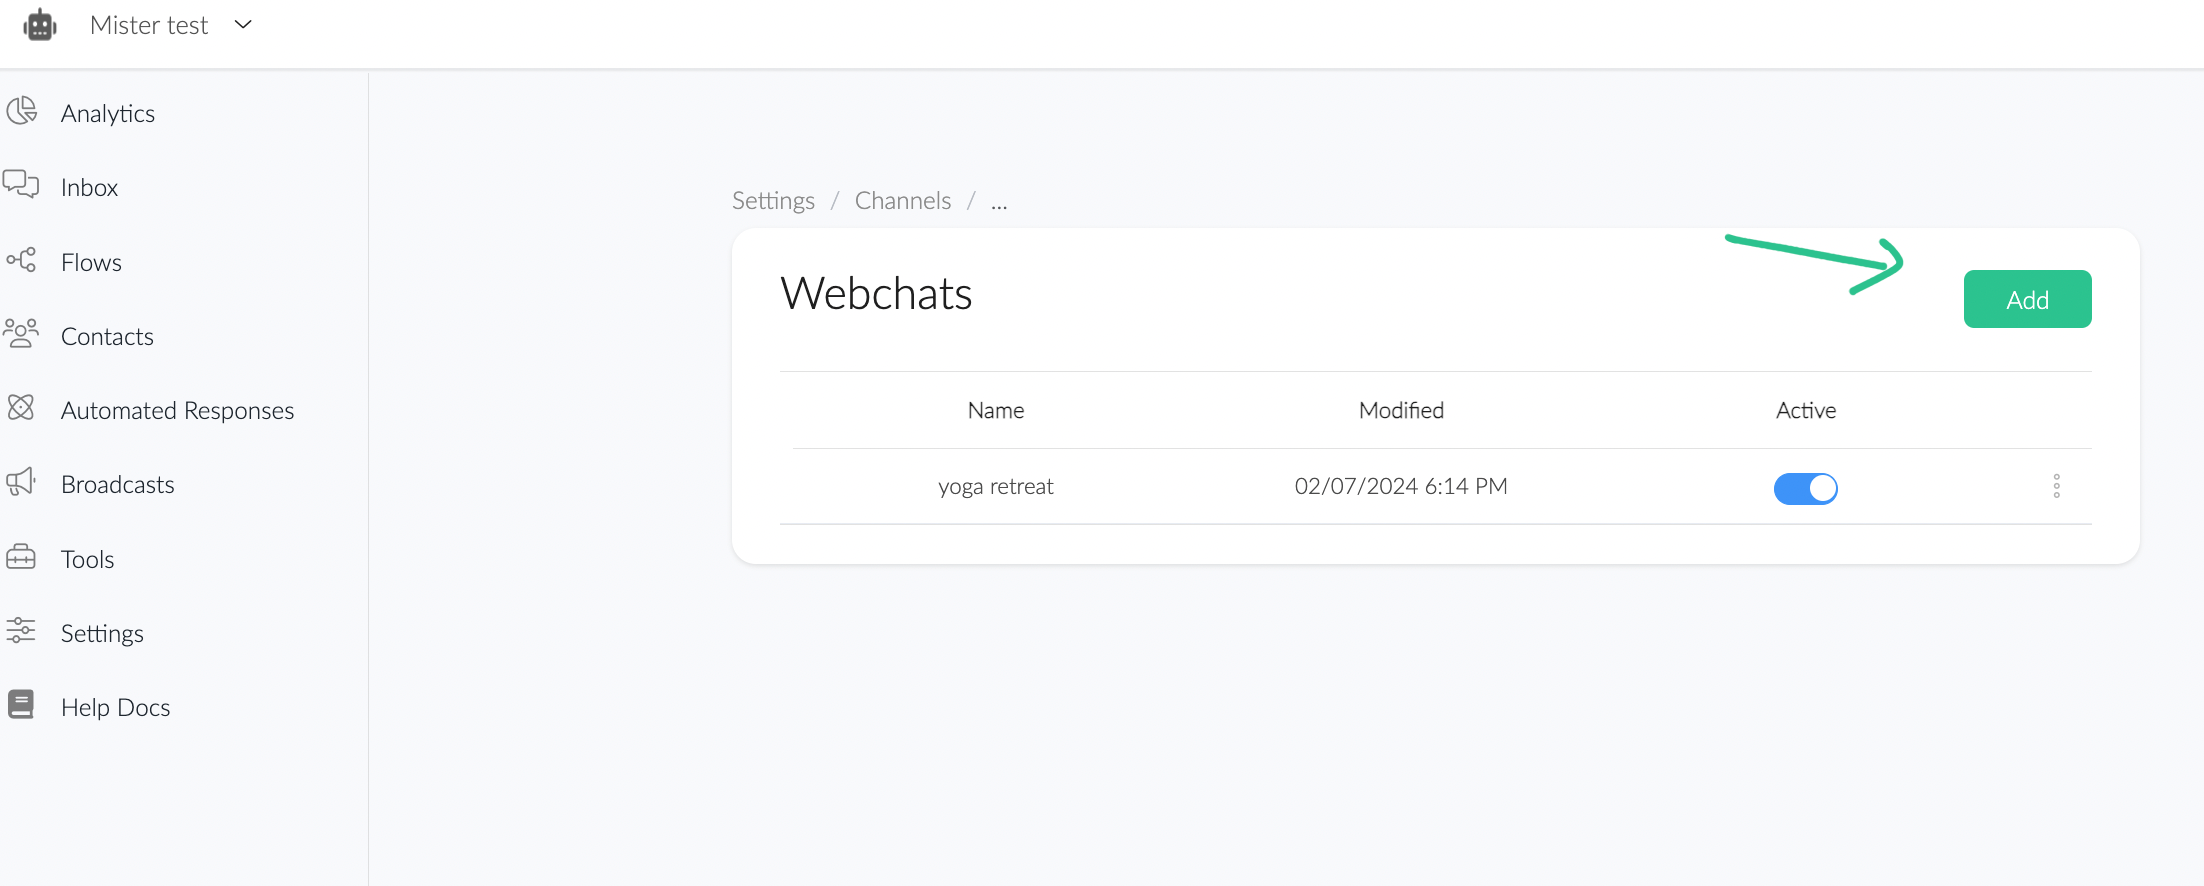
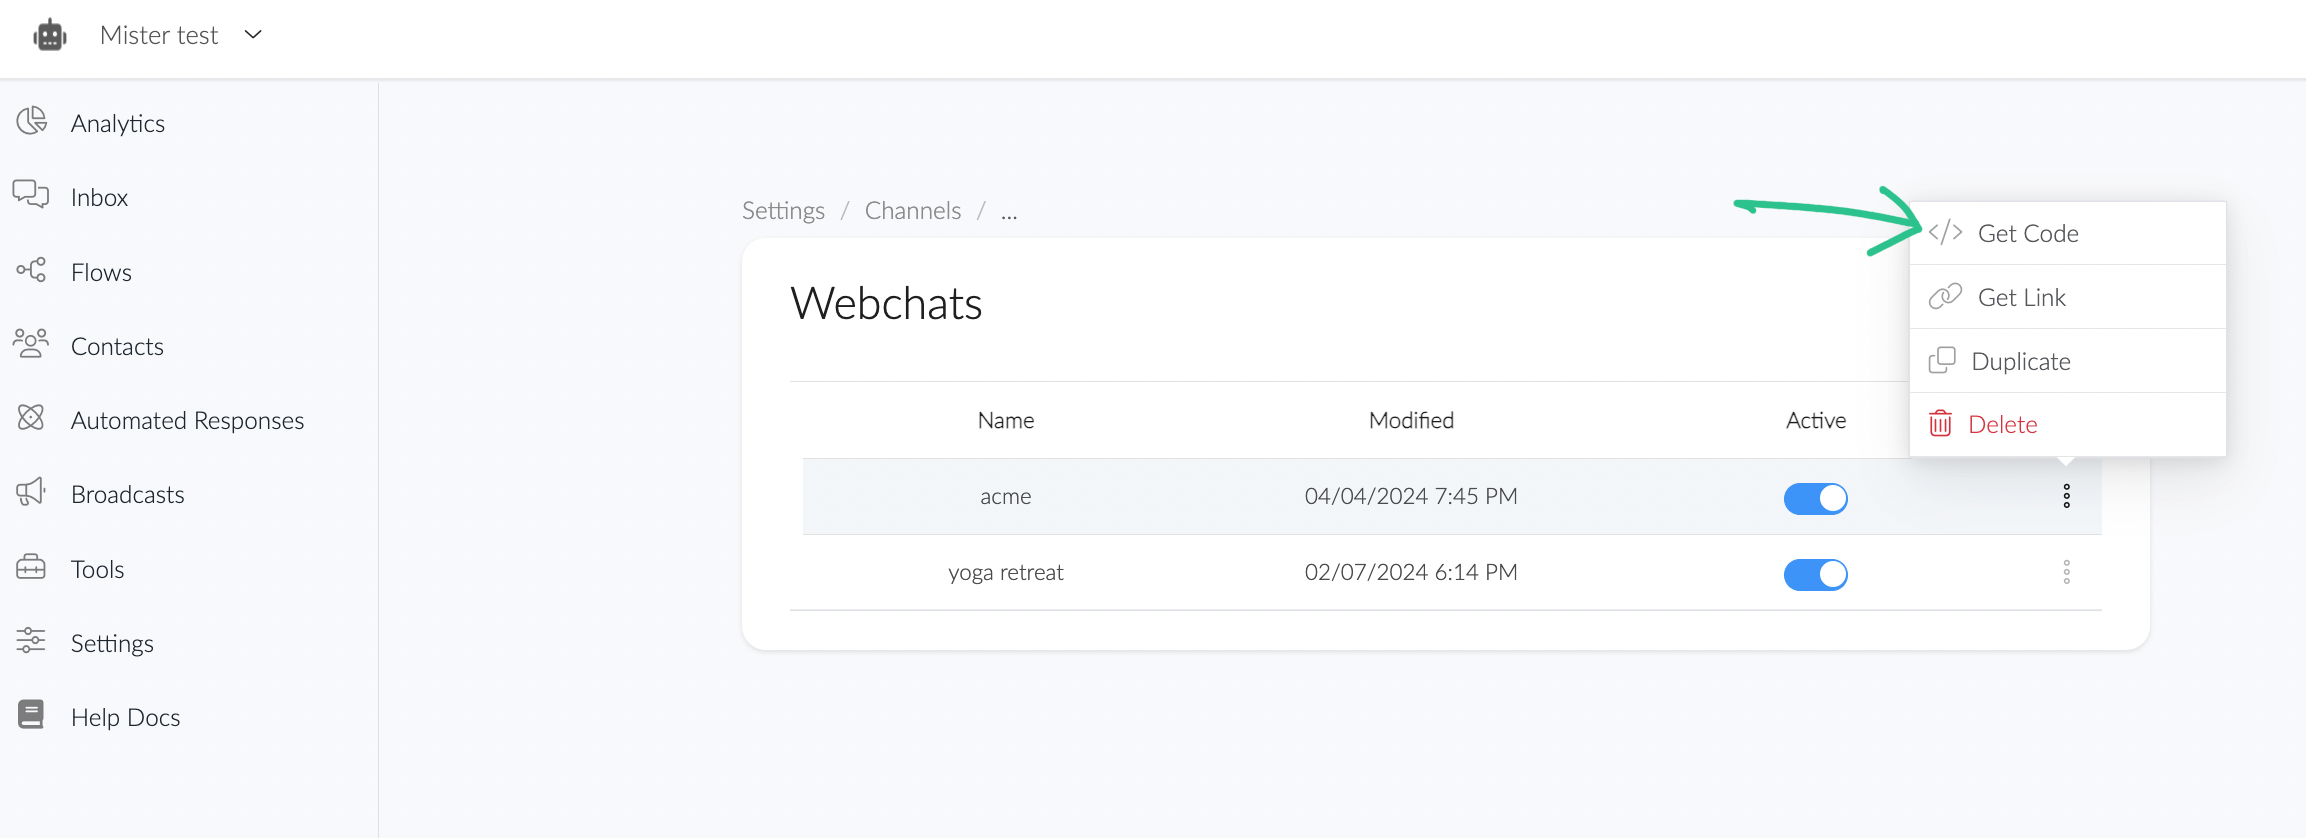
After creating and saving your Webchat, click 3 dots and get the code.
2 – Copy and insert the following code into your website’s body or footer.
Copy code:
<script src=”https://app.businessdata.com/webchat/plugin.js”></script><script>
ktt10.setup({ pageId: YOUR_ACCOUNT_ID});
</script>
This simple code snippet will embed a webchat on your website. Implementing the Webchat as a Standalone Page:
Navigate to the URL, replacing “YOUR_ACCOUNT_ID” with your account ID: https://app.businessdata.com/webchat/?p=YOUR_ACCOUNT_ID
Customising Color Scheme
To change the color of the webchat interface, include a ‘color’ attribute within the setup function as follows:
Copy code:
<script src=”https://app.businessdata.com/webchat/plugin.js”></script><script>
ktt10.setup({ pageId: YOUR_ACCOUNT_ID, color: “#ff0000”});
</script>
Replace “#ff0000” with your desired color code.
Switching Webchat Templates
Business Data currently offers three templates for webchat. We’ll soon offer more template options. To change the template, include a ‘template’ attribute within the setup function as follows:
Copy code:
<script src=”https://app.businessdata.com/webchat/plugin.js”></script>
<script>
ktt10.setup(
{
pageId: YOUR_ACCOUNT_ID,
color: “#007BFF”,
hideHeader: true,
template: “template1”
}
);
</script>
Business Data currently provides three templates: a standard default template and two additional templates named “template1” and “template2”. More templates will be introduced in the future.
Displaying the Account Profile Picture as a Persona
To showcase your account profile image as a persona within the chat, use the ‘showPersona’ attribute as follows:
Copy code:
<script src=”https://app.businessdata.com/webchat/plugin.js”></script><script>
ktt10.setup({ pageId: YOUR_ACCOUNT_ID, showPersona: true});</script>
Modifying the Chat Icon
To change the chat icon, use the ‘icon’ attribute and specify the URL of your desired image:
Copy code:
<script src=”https://app.businessdata.com/webchat/plugin.js”></script>
<script>
ktt10.setup({ pageId: YOUR_ACCOUNT_ID, showPersona: true, icon: “YOUR_IMAGE_URL”});
</script>
Replace “YOUR_IMAGE_URL” with the URL of your chosen image.
Option Name | Possible Values/Description | Default |
type | floating/window/container container: include the chatbot inside any HTML element window: the chatbot will open on a new window | floating |
element | Only used if “type” is “container”. example “#div1” | |
headerTitle | The title that is shown on the header of the webchat | Account Name |
color | any color name or color code | #007BFF |
hideHeader | Hide the session that contains the business name true/false | FALSE |
ref | any ref/flow/step ID to be sent automatically once the user clicks on the chat ICON.
Set ref as “get_started_button” to automatically send the Welcome flow. | |
showPersona | true/false | FALSE |
hideComposer | true/false | FALSE |
template | template1/template2 | |
icon | the chat icon that shows on the bottom | right | |
right | Distance of the icon from the left edge of the screen | 20px |
bottom | Distance of the icon from the bottom edge of the screen | 20px |
loadMessages | Load past conversations with the contact when webchat is opened. true/false | TRUE |
Transitioning the Conversation from Any Channel to Webchat
Not all channels support the comprehensive features offered by webchat. For example, if a customer is communicating with your business via SMS and you want to showcase a gallery list of your services, you can transfer the conversation to webchat.
Simply send the user a message containing the following system custom field: {{webchat}}
To automatically start a specific flow or step when the user accesses this link, append “&ref=FLOW_OR_STEP_ID” to the end.
For example, if the FLOW_ID is 111111, the link would be:
{{webchat}}&ref=111111
This link will load previous messages from the conversation between the bot and the user.
If you prefer not to load old messages, append “&lc=0” at the end of the link:
{{webchat}}&ref=111111&lc=0
iFrame
<div style=”width:100%; padding-bottom:56.25%; position:relative;”>
<iframe src=”{{Your WebChat Link HERE}}” style=”position:absolute; top:0px; left:0px;
width:100%; height:100%; border: none; overflow: hidden;”>iframe>
div></iframe></div>
Back to Documentation Home